Incident response using the Google Drive API
by Jeff
Google Drive
Realtime, web-based file systems like Google Drive have changed the way organizations operate and interface with each other. Sharing documents between individuals used to mean email attachments, network drive mapping, etc. Now it’s as easy to share a doc as sending someone a link.
Unfortunately too often sharing controls are misused, or misunderstood which can result in data leaks and in some cases escalations leading to information system compromise. In this post I’ll take you through using jupyter notebooks to do an investigation of a Gsuite environment to find and fix a file that’s been incorrectly shared.
GDrive API
While the G Suite console is useful, for this exercise we will need the flexibility of the Drive API. Specifically, we will begin with the cloud resource manager to create a new cloud project. This project will be used to create credentials and scopes that will allow us to impersonate any user in our G Suite organization. This impersonation allows us to peek into the files they have in Drive and correct any sharing settings. Note that you’ll only need to do this project setup portion once and then you’ll be able to use the Drive API in all your investigation work within your organization. I recommend every security team in an org using G Suite have pre-prepared projects ready to go for investigations and incident response.
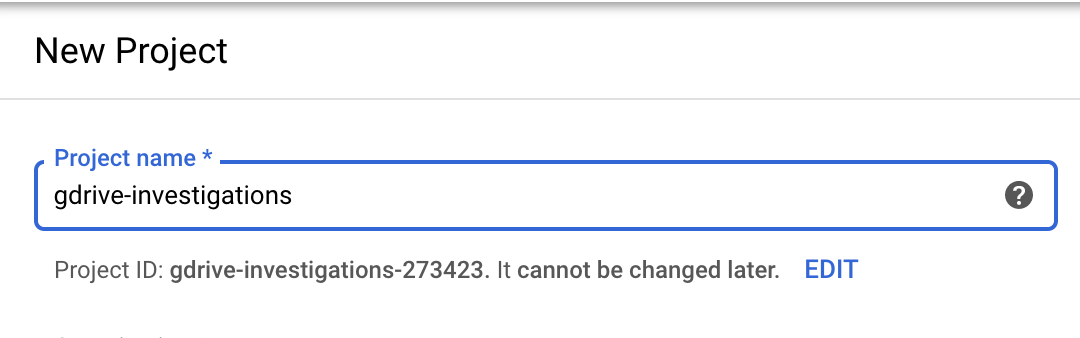
In the cloud resource manager click “create new project” and give it a good, descriptive name:
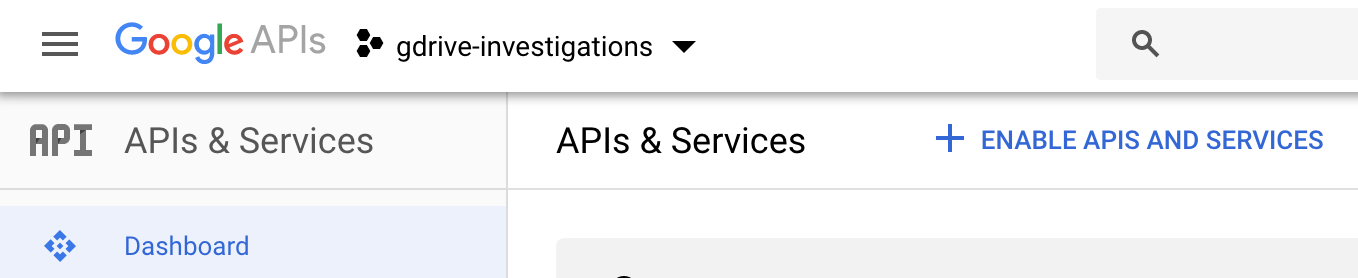
Lets enable the Drive API by choosing “enable apis and services” from the “dashboard” menu for the project:
Search for “Drive” and click the “enable” button.
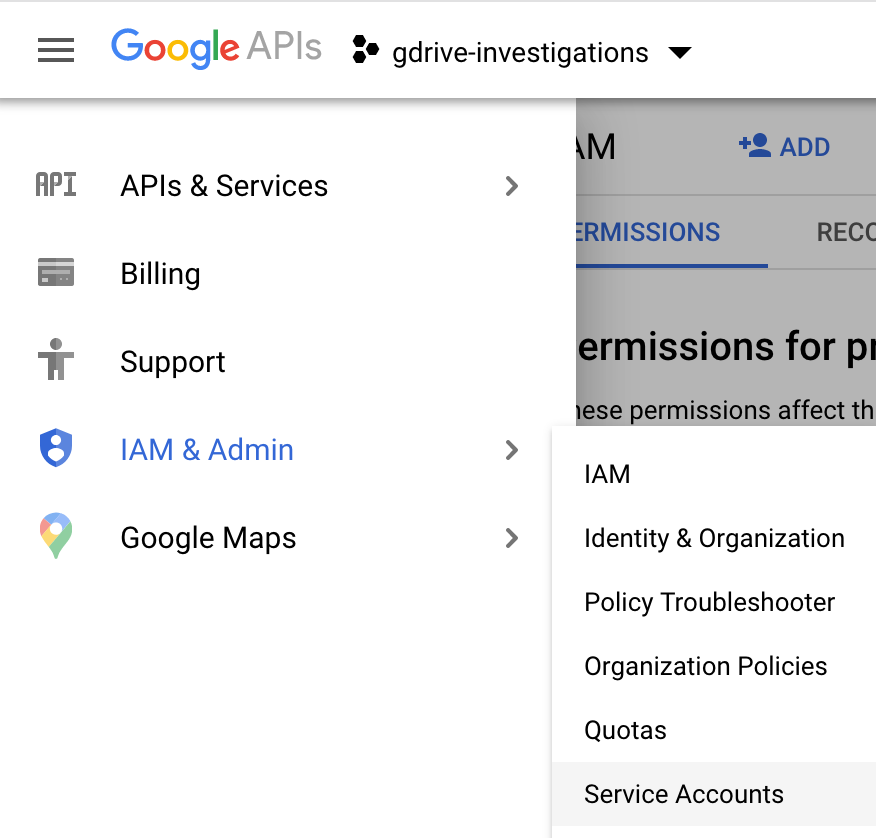
Now we will need a service account and credentials. There are multiple ways to get to the screen to create service accounts. The easiest is the navigation menu in the upper left, IAM & Admin and then service accounts:
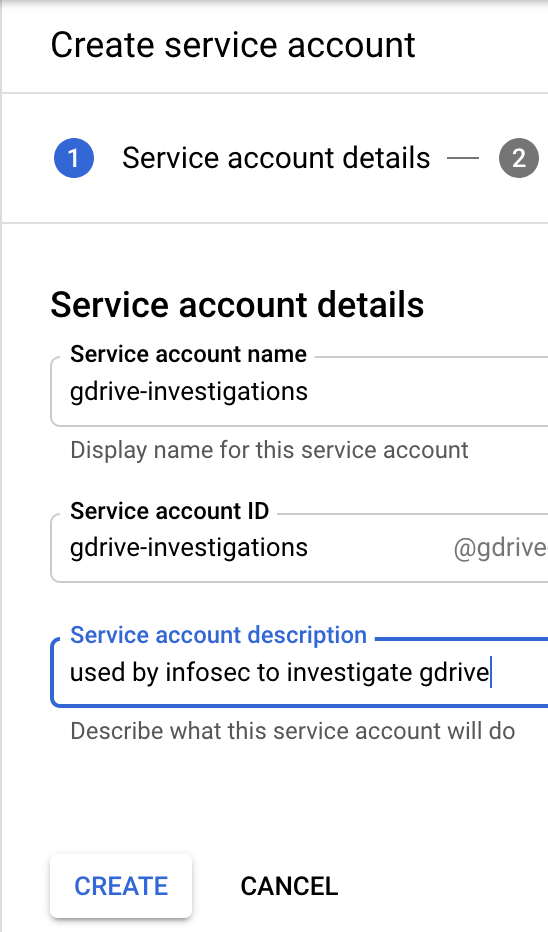
Click create service account and give it a meaningful name and description:
It will next prompt you for “service accounts permissions”. Since we aren’t using any Google Cloud resources, it needs no permissions on the project as it will strictly be using the Drive API.
Next it will prompt you to add any other users in your organization to the service account. This step is optional depending on your organization and you can always add folks later. The last step is not optional. Choose ‘create key’ to download a json file that we will use to authenticate to the API. Choose ‘key type’ of ‘JSON’ and save it to your local drive. The file will be named something like ‘projectname-guid-guid.json’ and should be considered a secret that you do not share or publish publicly.
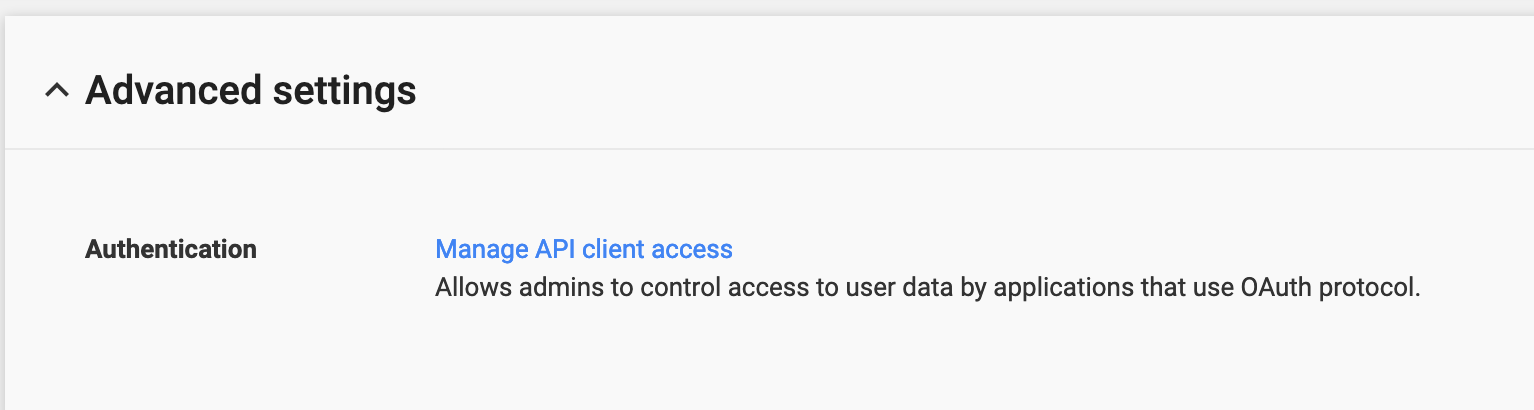
Next we will enable domain wide delegation for this service account. Open your Gsuite Admin console and navigate to Security → Advanced Settings and choose ‘Manage API Client Access’.
It’s a bit confusing, but this screen wants the ‘unique id’ or ‘client id’ assigned to your service account. Depending on the UI you are getting from Google, you can’t copy the unique ID from anywhere I can find but you can copy the ‘email’ of the service account from the Credentials screen:
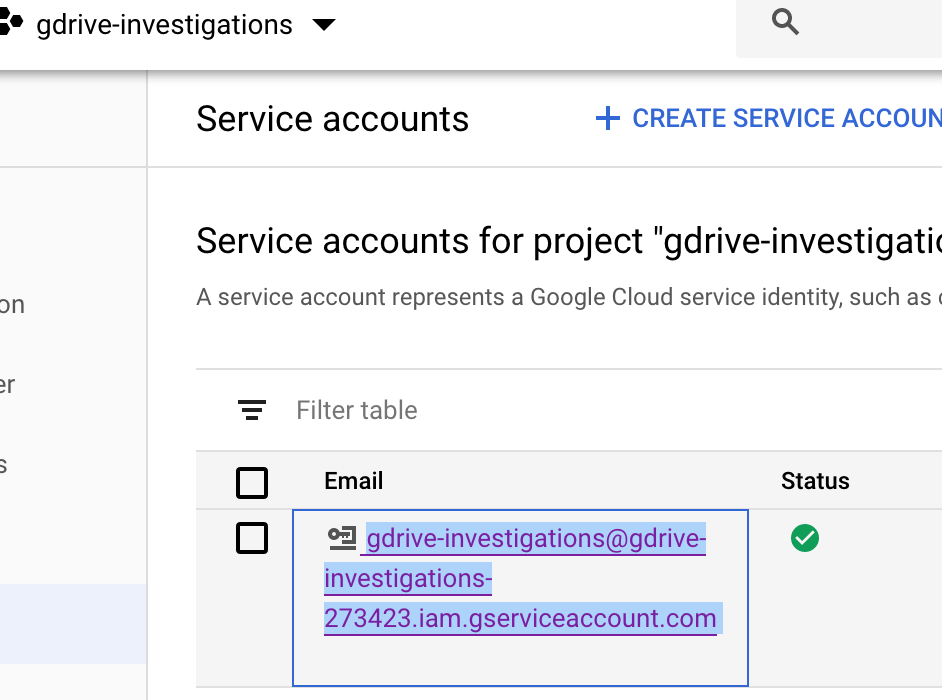
Paste this Email identifier into the Admin console field asking for “Client Name” and add https://www.googleapis.com/auth/drive to the “Scopes” field and click “Authorize”.
You should see the ‘unique id’/’client id’ of your service account and the drive api scope listed in the resulting list.
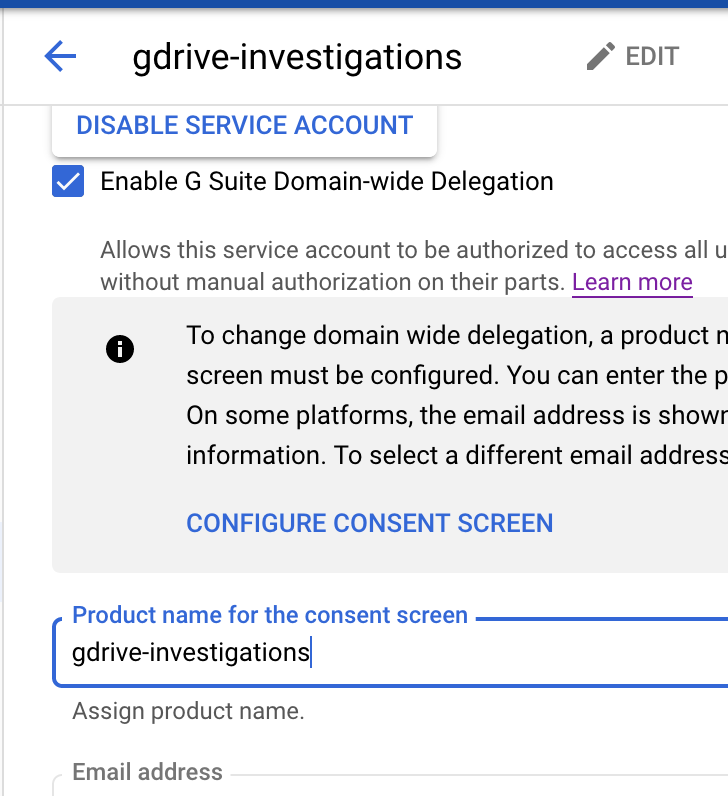
Now we need to enable domain-wide delegation within the service account. In the ‘service account details’ screen choose edit and click the pull down for “show domain-wide delegation” and choose ‘Enable G Suite Domain-wide Delegation”

You may be prompted to also add a consent screen title and contact information:
Note that the delegation process may take a while to fully complete. If you get access token errors in your jupyter investigation immediately after creating the delegation, give it a bit and come back to it. If after waiting, you still get access token errors you should try removing and re-adding the delegation.
Jupyter Investigation
Now we are ready to fire up jupyter and get our investigation started. Note that you only need to set up this service account once and you can then use it in any investigation, any number of times. Again, note that it may take a bit of time before the delegated access takes effect.
See my previous post if you need a jumpstart into your jupyter environment. Download the notebook for this project and open it up in your jupyter environment. In the jupyter notebook for this blog post I’ve included a cell to pip install the supporting libraries you might need. You only need to run this cell once, after that the libraries are available for use.
In this scenario we’ve been informed that a user has shared a document internally to ‘anyone with the link’ and the document has the word ‘secret’ in the name. Here’s the doc:

Let’s use our Drive API access to fire up a search for this file and correct the sharing settings.
The notebook includes a cell to set up access to your service account credentials and set the user you will be impersonating.

We use both the v2 and v3 versions of the Drive API for different reasons which we will discuss below.
The next cell has some simple code to search for a file by the file name. This feature seems like the reason to use v3 of the Drive API. As mentioned above, we know the file has the word secret in it; so we look for any files that match and are returned the file ID:

The paged api can go on and on if you don’t search specifically enough, so it’s set to only return 5 pages of results. Feel free to tune it to your tastes and environment.
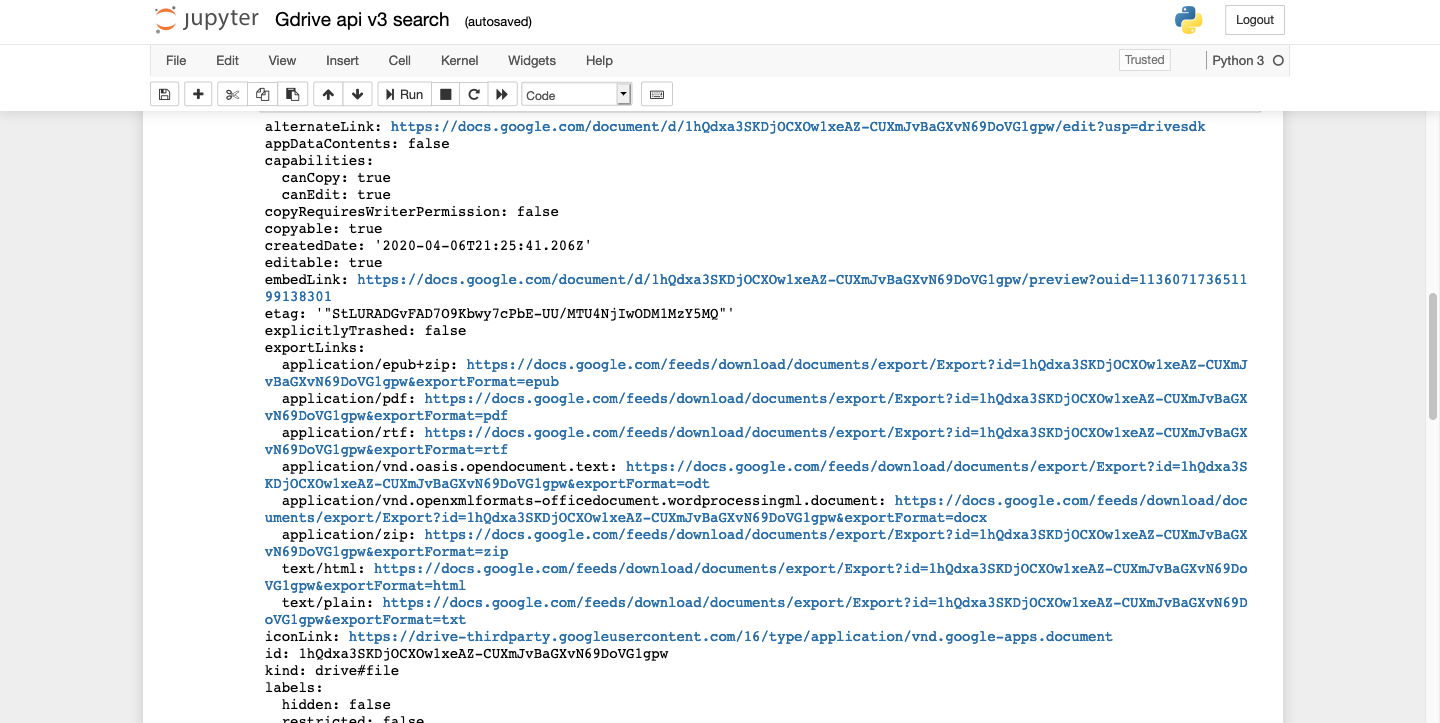
Drive api v2 seems to have quite a bit more metadata available as shown in the next cell which can help us orient our investigation timeline, etc.
Jupyter Permissions Remedy
While it includes some permissions, it doesn’t quite get us what we need. For that we call the drive v2 api permissions endpoint and look for a permission with type of domain and withLink set to True:

Note the permission ID which we will use in the next cell to remove the errant sharing:

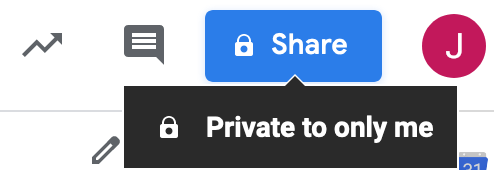
Silence is success. If we attempt to remove it again, it will error with a 404 as that permission is no longer applied. On the user side of the equation the doc now shows private only to the user:
It’s a Wrap
The API behind G Suite is rich and evolving. Having it at your fingertips during an investigation or incident can be a lifesaver if you have ready-made playbooks at hand. You definitely don’t want to be searching through the raw API docs at 2am trying to piece together code snippets. Hopefully you will find this useful in your own organization’s threat hunting and response efforts.
References
Here’s some references if you are interested in exploring further:
- The notebook used here
- python quickstart
- Service Accounts
- Delegating service accounts
- Controlling api access
- Drive v3 reference
- Drive v2 reference
vCISO
If you’d like some help kickstarting your information security program, or specific help with an incident response feel free to contact me about bespoke vCISO services for your organization.
tags: infosec - python - incident response - jupyter